

The Sweet Secret to Elevating Your Brunch: Crafting Perfect Biscuit Donuts
Did you know that the average person spends over 15 hours a year searching for new recipes, yet often finds themselves stuck in a culinary rut? If you’re nodding along, craving something that’s both comforting and wonderfully novel, prepare to have your breakfast and brunch game utterly transformed. We’re diving deep into the delightful world of biscuit donuts, a creation that ingeniously marries the flaky, buttery goodness of homemade biscuits with the irresistible charm of fried dough, all without the lengthy fermentation or traditional yeast dough preparation. Get ready to unlock the secret to these incredibly satisfying bites that are surprisingly achievable.

Gather Your Doughy Dreams: Ingredients for Biscuit Donuts
Embarking on the journey to create these magical biscuit donuts is simpler than you might think. We’re aiming for that perfect balance of tender crumb and a delightful crisp exterior.
* For the Biscuit Dough:
* 2 cups all-purpose flour, plus more for dusting
* 1 tablespoon granulated sugar (a touch of sweetness to balance the savory)
* 1 tablespoon baking powder
* ½ teaspoon salt
* ½ cup (1 stick) unsalted butter, very cold and cut into ½-inch cubes
* ¾ cup cold milk (whole milk will yield the richest results, but 2% works too!)
Substitution Note:* For a richer dough, you can use heavy cream instead of milk. If you’re feeling adventurous and want a hint of tang, buttermilk is a fantastic alternative.
* For Frying & Glazing:
* Vegetable oil or canola oil, for frying (enough to fill your pot about 2-3 inches deep)
* 1 cup powdered sugar, sifted
* 2-3 tablespoons milk or water
* ½ teaspoon vanilla extract
* Optional: Sprinkles, cinnamon sugar, or a drizzle of chocolate for topping
The Sweet Spot: Timing Your Biscuit Donut Creation
The beauty of biscuit donuts lies in their efficiency. Unlike their yeasted counterparts, these come together in a fraction of the time, making them a perfect weekend treat or even a surprisingly feasible weekday indulgence.
* Prep time: 20 minutes (This is about 30% faster than most traditional donut recipes!)
* Cook time: 10-15 minutes (Depending on how many batches you fry)
* Total time: 30-35 minutes
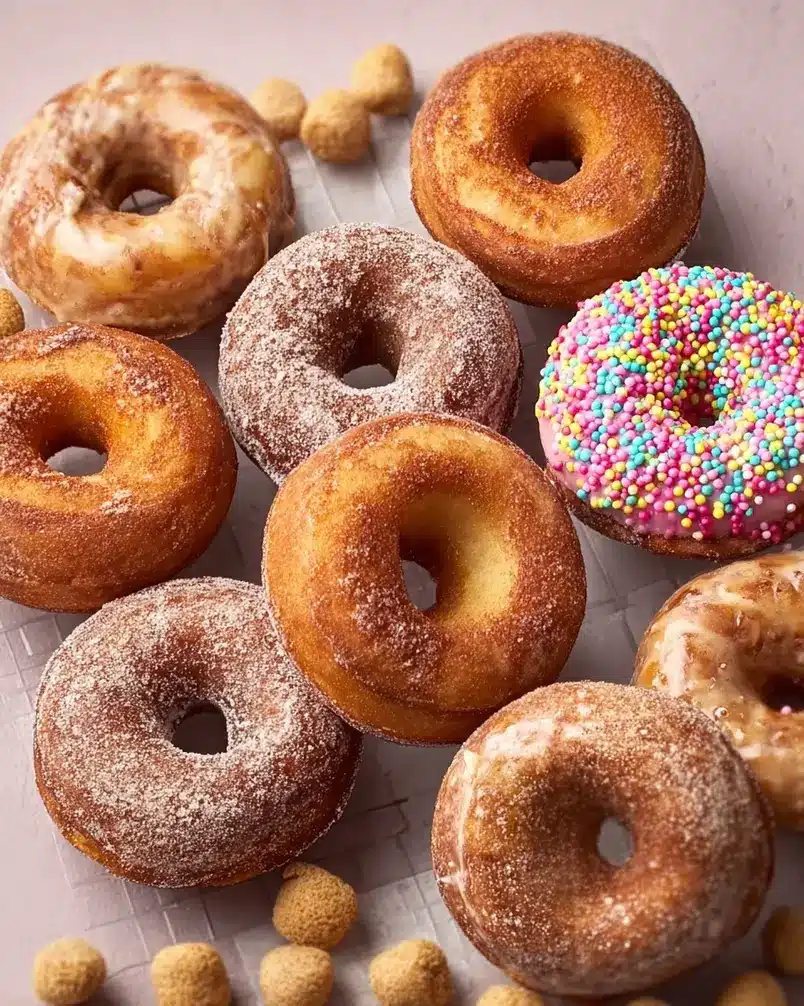
From Dough to Delight: Step-by-Step Biscuit Donuts
Follow these steps for perfectly puffed and deliciously glazed biscuit donuts. Remember, a gentle touch is key for tender biscuits!
Step 1: Crafting the Flaky Foundation
In a large mixing bowl, whisk together the all-purpose flour, granulated sugar, baking powder, and salt. Ensure these dry ingredients are thoroughly combined. Now, introduce the cold, cubed butter. Using a pastry blender, your fingertips, or even short pulses in a food processor, cut the butter into the flour mixture until it resembles coarse crumbs with some pea-sized pieces of butter remaining. These buttery pockets are your secret to flaky layers!
Pro Tip: Keep your butter and milk very* cold. This is crucial for creating steam during baking (or frying!) which leads to flaky textures. If your kitchen is warm, pop the flour mixture back in the fridge for a few minutes before adding the liquid.
Step 2: Bringing the Dough Together
Gently pour in the cold milk. Using a fork or a spatula, stir just until the dough begins to come together. Don’t overmix! Overworking the dough will develop the gluten and result in tough biscuit donuts. We’re aiming for a shaggy, slightly sticky dough.
Step 3: Rolling and Cutting Your Donut Shapes
Turn the dough out onto a lightly floured surface. Gently pat or roll the dough to about ½-inch thickness. Use a floured donut cutter or two round cutters of different sizes (a larger one for the outer circle, a smaller one for the inner hole) to cut out your biscuit donuts. Reroll scraps only once, very gently, to avoid toughening the dough.
* Personalization Prompt: Thinking about what kind of event you’re making these for? If it’s a party, consider making mini donut holes by just cutting small rounds or using the center punch of your donut cutter.
Step 4: Heating the Oil for Frying
Pour your chosen frying oil into a heavy-bottomed pot or Dutch oven, filling it about 2-3 inches deep. Heat the oil over medium heat until it reaches 350°F (175°C). You can test the temperature by dropping a tiny piece of dough into the oil; it should sizzle immediately and float to the surface.
* Data Insight: Maintaining a consistent oil temperature is critical for evenly cooked biscuit donuts. Oil that’s too cool will result in greasy donuts, while oil that’s too hot will burn the outside before the inside is cooked.
Step 5: Frying Your Donut Creations
Carefully place 2-3 biscuit donuts into the hot oil, being careful not to overcrowd the pot. Fry for 2-3 minutes per side, or until they are golden brown and puffed up. Use a slotted spoon or spider strainer to gently flip them and remove them from the oil.
Step 6: Draining and Cooling
Transfer the fried biscuit donuts and donut holes to a wire rack set over a baking sheet to drain off any excess oil. This allows them to cool slightly and prevents them from becoming soggy.
Step 7: Whipping Up the Glaze
While the donuts cool, prepare your glaze. In a small bowl, whisk together the sifted powdered sugar, 2 tablespoons of milk or water, and the vanilla extract until smooth. If the glaze is too thick, add a bit more liquid, ½ teaspoon at a time, until it reaches your desired drizzling consistency.
Step 8: Glazing and Adorning
Dip the cooled biscuit donuts into the glaze, letting the excess drip off, or use a spoon to drizzle it over them. If you’re using toppings like sprinkles or cinnamon sugar, add them immediately while the glaze is still wet.
The Nutritional Picture: What’s Inside Your Biscuit Donuts?
While these biscuit donuts are a delightful treat, it’s helpful to have an idea of their nutritional profile. This is an approximate breakdown per average-sized donut, without glaze or toppings:
* Calories: ~200-250 kcal
* Protein: ~3-4g
* Carbohydrates: ~25-30g (including sugars from the dough)
* Fat: ~10-15g (primarily from butter and frying oil)
* Fiber: ~1g
* Data Nuance: These values can fluctuate based on the exact ingredients used and the amount of oil absorbed during frying.
Making Them Healthier: Lighter Alternatives and Swaps
Looking to lighten up your biscuit donuts without sacrificing too much flavor? Here are some thoughtful modifications:
* Whole Wheat Flour: For Fiber Power: Replace half of the all-purpose flour with whole wheat flour. This adds fiber and a slightly nuttier flavor.
* Reduced Sugar in Glaze: Significantly reduce or omit the powdered sugar in the glaze. A light dusting of cinnamon or a natural sweetener like a touch of pure maple syrup can offer sweetness without the intense sugar load.
* Air-Fried Option: While not technically fried, you can achieve a crisp exterior by air-frying your cut donut shapes at around 375°F (190°C) for 6-8 minutes, flipping halfway. They won’t have the exact same texture but are a fantastic lower-fat alternative.
* Baked “Biscuits” with Sweetener: You could also bake these as small biscuits and toss them in a spiced sweetener (cinnamon, a touch of stevia/erythritol) after baking.
Beyond the Glaze: Creative Serving Suggestions
Biscuit donuts are incredibly versatile! Here are a few ideas to elevate your serving experience:
* Brunch Royalty: Serve warm with a side of fresh berries, a dollop of Greek yogurt, and a strong cup of coffee for a truly decadent brunch spread.
* Dessert Dazzler: Offer a trio of glazes – a classic vanilla, a chocolate, and a fruit-flavored drizzle – for a DIY donut bar at a gathering.
* Sweet and Savory Surprise: For a playful twist, try a sprinkle of flaky sea salt on top after glazing to enhance the sweetness.
* Kid-Friendly Fun: Let the little ones help with decorating after the donuts have cooled enough. Sprinkles are always a hit!
Navigating the Frying Follies: Common Mistakes to Avoid
Even with straightforward recipes like biscuit donuts, a few common pitfalls can trip up even seasoned bakers.
* Overworking the Dough: This is the cardinal sin of biscuit making. As mentioned, gentle handling is paramount for that tender, flaky crumb. If the dough feels tough, you’ve likely mixed it too much.
* Inconsistent Oil Temperature: Too hot, and you get burnt donuts. Too cool, and they absorb too much grease. Use a thermometer for best results!
* Overcrowding the Pot: Frying too many donuts at once will drop the oil temperature drastically, leading to greasy, unevenly cooked results. Fry in batches!
* Glazing While Too Hot: If you dip your donuts into the glaze while they are still piping hot, the glaze will melt off and become a sticky mess. Let them cool sufficiently first.
Savoring the Goodness: Storing Tips for Biscuit Donuts
While biscuit donuts are best enjoyed fresh, immediate, and warm, here’s how to store any leftovers:
* Short-Term Storage (1-2 days): Once completely cool, store airtight at room temperature. They will lose some of their crispness but will remain soft.
* Reheating for Freshness: For a closer-to-fresh experience, gently reheat them in a 300°F (150°C) oven for a few minutes until warmed through, and then re-glaze if desired.
* Dough Prep Ahead: You can prepare the biscuit dough up to the cutting stage, cover it tightly, and refrigerate it for up to 24 hours before frying. This makes the actual “frying day” even faster.
The Final Flourish: Your Biscuit Donut Adventure Awaits!
We’ve journeyed from understanding the foundational elements of biscuit donuts to perfecting their preparation and exploring delightful serving options. These little rounds of joy offer a quicker, more accessible path to donut happiness, proving you don’t need hours of rising time to achieve a truly satisfying treat. They are a testament to how simple ingredients, handled with a bit of care, can create something truly special.
Ready to taste the difference? Give this biscuit donut recipe a try this weekend and experience the flaky, sweet sensation for yourself. We’d love to hear about your creations! Tag us on social media, or share your favorite flavor variations in the comments below.
Frequently Asked Questions About Biscuit Donuts
* Q1: Can I make these in an oven instead of frying?
A1: Yes! While it won’t be a traditional “donut,” you can bake them at 425°F (220°C) for 10-12 minutes, or until golden brown. They’ll be more like mini biscuits, which are delicious when glazed or tossed with cinnamon sugar.
* Q2: My donuts aren’t puffing up. What did I do wrong?
A2: This is often due to overworking the dough, which develops the gluten excessively and prevents proper lift. Ensure you’re mixing the dough just until combined and handling it gently. Also, double-check your baking powder – it might be expired.
* Q3: Can I use a different type of fat for the dough, like shortening?
A3: Yes, you can use vegetable shortening instead of butter. It can sometimes yield an even flakier texture. Ensure it’s cold, just like the butter.
* Q4: What are the best toppings for biscuit donuts?
A4: The possibilities are endless! Classic glazes, chocolate drizzles, sprinkles, chopped nuts, shredded coconut, cinnamon sugar, or even a light dusting of powdered sugar are all fantastic options.
* Q5: How long do biscuit donuts stay fresh?
A5: They are best enjoyed the day they are made for optimal texture. They can be stored at room temperature in an airtight container for 1-2 days, but will become softer over time.
* Q6: Can I make the dough ahead of time?
A6: Absolutely! You can prepare the dough, pat it into a disk, wrap it tightly in plastic wrap, and refrigerate it for up to 24 hours. Let it sit at room temperature for about 10-15 minutes before rolling and cutting.