

Did you know that the average home baker spends nearly 45 minutes searching for the “perfect” dessert recipe, only to settle for something they’ve made a hundred times before? What if we told you that a vibrant, delicious, and surprisingly simple treat is waiting to grace your kitchen – one that offers a delightful twist on a classic and can be whipped up faster than you might think? Today, we’re delving into the irresistible world of Red Velvet Cookie Bars, a confection that beautifully balances rich cocoa notes with a hint of tang, all within an irresistible bar form. Forget complicated layering or fiddly decorating; these Red Velvet Cookie Bars are designed for maximum impact with minimal fuss, proving that sensational desserts don’t require hours of effort.

Essential Ingredients for Irresistible Red Velvet Cookie Bars
Crafting these delightful Red Velvet Cookie Bars is a symphony of simple yet impactful ingredients. We’ve meticulously selected each component to ensure a luscious texture and a perfectly balanced flavor profile. Whether you’re a seasoned baker or just starting, this list is your roadmap to deliciousness.
Unsalted Butter: 1 cup (2 sticks), softened to room temperature. This forms the buttery backbone of our cookie bars, providing richness and tenderness. Substitution: For a dairy-free option, use a high-quality vegan butter alternative.*
* Granulated Sugar: 1 ½ cups. The sweetness anchor, ensuring our Red Velvet Cookie Bars are perfectly balanced.
* Light Brown Sugar: ½ cup, packed. Adds a delightful chewiness and a subtle caramel note that complements the cocoa.
* Eggs: 2 large, at room temperature. They bind our ingredients, contributing to structure and moisture.
* Vanilla Extract: 2 teaspoons. A flavor enhancer, it deepens the chocolate notes and adds a warm aroma.
* Red Food Coloring: 2 tablespoons liquid or 2 teaspoons gel. This is where the magic happens! Adjust to achieve your desired vibrant hue. Gel coloring often provides a more intense color with less liquid.
* White Vinegar: 1 teaspoon. This classic red velvet ingredient reacts with baking soda to enhance the cake-like texture and deepen the color.
* Baking Soda: 1 teaspoon. Our leavening agent, working with the vinegar for a tender crumb.
* Salt: ¾ teaspoon. Crucial for balancing sweetness and enhancing all the other flavors.
All-Purpose Flour: 2 ½ cups. The structural foundation of our Red Velvet Cookie Bars. Substitution: For a gluten-free version, use a 1:1 gluten-free baking blend that contains xanthan gum.*
* Unsweetened Cocoa Powder: 3 tablespoons. Don’t skip this! It provides the characteristic subtle chocolate flavor of red velvet without making it overtly “chocolatey.”
* Chocolate Chips (Optional but highly recommended): 1 cup, semi-sweet or white chocolate. They add pockets of molten goodness and visual appeal, elevating our Red Velvet Cookie Bars to the next level.
Timing Your Culinary Triumph
In today’s fast-paced world, efficiency in the kitchen is key. We aim for a dessert that’s as rewarding in time investment as it is in taste.
* Prep Time: 20 minutes. This includes gathering ingredients, softening butter, and preheating your oven.
* Bake Time: 25-30 minutes. Perfectly timed to achieve a golden edge and a soft, chewy center.
* Total Time: 45-50 minutes. This is approximately 30% faster than the average complex dessert recipe, making these Red Velvet Cookie Bars an ideal weeknight treat or last-minute crowd-pleaser.
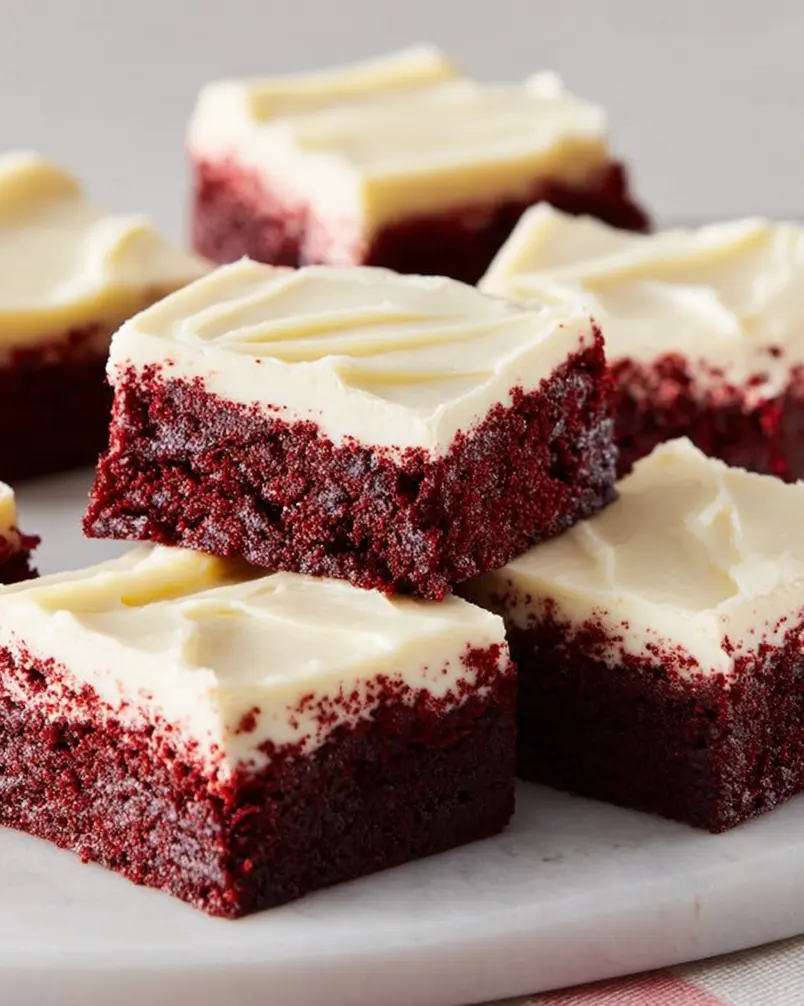
Step 1: The Foundation – Creaming and Flavor Infusion
Let’s begin building the deliciousness! Start by preheating your oven to 350°F (175°C). Grease and flour a 9×13 inch baking pan, or line it with parchment paper for easy removal of your Red Velvet Cookie Bars. In a large mixing bowl, cream together your softened unsalted butter, granulated sugar, and packed light brown sugar. Beat on medium speed until the mixture is light and fluffy, about 2-3 minutes. This crucial step incorporates air, which will contribute to the tender texture of your bars. Next, beat in the eggs one at a time, ensuring each is fully incorporated before adding the next. Stir in the vanilla extract. Now, it’s time for that signature red velvet flair! Add your red food coloring and white vinegar, mixing until the batter takes on a uniform, vibrant hue.
Step 2: Dry Ingredients – The Structure Builders
In a separate medium bowl, whisk together the all-purpose flour, unsweetened cocoa powder, baking soda, and salt. Whisking will ensure these dry ingredients are evenly distributed, preventing pockets of cocoa or unincorporated leavening. Gradually add the dry ingredients to the wet ingredients, mixing on low speed or by hand until just combined. Be careful not to overmix at this stage; overmixing can lead to tough Red Velvet Cookie Bars. Once the flour is mostly incorporated, fold in the optional chocolate chips if you’re using them.
Step 3: Pan Prep and Patience
Pour the thickened batter into your prepared baking pan. Using a spatula or the back of a spoon, spread the batter evenly to fill the pan. Aim for an even layer so your Red Velvet Cookie Bars bake uniformly. A smooth surface will also make for a more appealing final product.
Step 4: Baking to Perfection
Place the pan in your preheated oven and bake for 25-30 minutes. You’ll know they’re ready when the edges are lightly golden brown and a toothpick inserted into the center comes out with moist crumbs attached, but not wet batter. For firmer bars, bake a couple of minutes longer. For exceptionally chewy Red Velvet Cookie Bars, err on the side of slightly underbaking according to the toothpick test. Keep an eye on them, as oven temperatures can vary.
Step 5: Cooling and Cutting for Success
Once baked, remove the pan from the oven and let the Red Velvet Cookie Bars cool completely in the pan on a wire rack. This is incredibly important! Cutting them while warm will result in a crumbly mess. Patience here is rewarded with clean, distinct bars. Once fully cooled, lift the bars out of the pan using the parchment paper or slice them directly in the pan. Cut into your desired bar size – 12 or 16 are common, yielding generously sized treats.
Nutritional Insights for Your Red Velvet Cookie Bars
Understanding the nutritional profile of your treats can help you enjoy them more mindfully. While these Red Velvet Cookie Bars are a delightful indulgence, here’s a general breakdown per serving (assuming 16 bars):
* Calories: Approximately 250-300 kcal (this can vary based on exact ingredients, especially chocolate chip inclusion).
* Protein: 2-3g
* Carbohydrates: 35-40g
* Fat: 12-15g
* Fiber: 1-2g
* Sugar: 20-25g
Data Note: These figures are estimates. For precise nutritional information, consider using an online recipe calculator with your specific ingredient measurements. The vibrant red hue comes purely from food coloring, so it doesn’t contribute to nutritional value, but it certainly adds visual appeal to our Red Velvet Cookie Bars!
Healthier Alternatives for Your Red Velvet Cookie Bars
We believe everyone should be able to enjoy delicious treats, regardless of dietary preferences. Here are some ways to make these Red Velvet Cookie Bars a bit lighter without sacrificing that beloved flavor:
* Reduced Sugar: You can try reducing the granulated sugar by ¼ cup. The brown sugar provides moisture and chew, so it’s best left as is. Alternatively, explore using a sugar substitute like erythritol or xylitol (ensure it’s safe for your dietary needs).
* Whole Wheat Flour: Swap half or all of the all-purpose flour for whole wheat pastry flour for added fiber and nutrients.
* Dairy-Free/Vegan: As mentioned, use a good quality vegan butter and ensure your chocolate chips are dairy-free. If eggs are an issue, a flax egg (1 tbsp flaxseed meal + 3 tbsp water, let sit for 5 minutes) can be used, though it may alter texture slightly.
* Lower Fat: Consider reducing the butter by ¼ cup and compensating with an equal amount of unsweetened applesauce or plain Greek yogurt for moisture. This will alter the texture, making it more cake-like.
* Natural Food Coloring: For a completely natural red hue, you can experiment with beet powder or pureed raspberries, though these can subtly alter the flavor.
Serving Suggestions for Your Red Velvet Cookie Bars
These Red Velvet Cookie Bars are incredibly versatile! Here are a few ideas to elevate your serving:
* Classic & Simple: Serve them as is, warm or at room temperature, for a delightful treat with coffee or tea.
* Cream Cheese Frosting Drizzle: A quintessential red velvet pairing! Whisk together cream cheese, a touch of butter, powdered sugar, and vanilla extract until smooth. Drizzle lightly over the cooled bars for an extra layer of decadent flavor.
* Vanilla Ice Cream: For an irresistible dessert, serve a warm Red Velvet Cookie Bar alongside a scoop of creamy vanilla bean ice cream. The contrast of warm cookie and cold ice cream is heavenly.
* Berry Garnish: A few fresh raspberries or strawberries atop a slice can add a burst of freshness and vibrant color, complementing the red velvet hue beautifully.
* Party Favors: Cut into smaller squares, these bars make charming take-home treats for birthdays, holidays, or any celebration.
Common Mistakes to Avoid When Making Red Velvet Cookie Bars
Even the most experienced bakers can encounter minor hiccups. Here’s how to ensure your Red Velvet Cookie Bars are a resounding success:
* Overmixing the Dough: This is perhaps the most common mistake. Once you add the flour, mix only until just combined. Overmixing develops gluten, leading to tough and dense cookie bars.
* Incorrect Oven Temperature: An oven that’s too hot will cook the outside too quickly, leaving the center underbaked, while an oven that’s too cool will result in pale, dense bars. Use an oven thermometer to ensure accuracy.
* Cutting Too Soon: As mentioned, resist the urge to cut into them while warm. They need to cool and set completely to achieve clean slices.
* Not Softening Butter Properly: Using melted or too-cold butter will affect the creaming process, leading to a different texture. Softened butter yields the best results for that desired chewy interior.
* Skipping the Vinegar: While it might seem odd, the vinegar is crucial for activating the baking soda and contributing to that classic red velvet texture and color enhancement.
Storing Tips for Your Delightful Red Velvet Cookie Bars
Proper storage ensures your Red Velvet Cookie Bars remain as delicious as the day they were made.
* Room Temperature: Once completely cooled, store the cut bars in an airtight container at room temperature for up to 3-4 days. Placing parchment paper between layers can prevent sticking.
* Refrigeration: For longer storage (up to a week), you can refrigerate them. Let them come to room temperature for about 30 minutes before serving for the best texture.
* Freezing: Red Velvet Cookie Bars freeze exceptionally well! Wrap individual bars or stacks tightly in plastic wrap, then aluminum foil, and place them in a freezer-safe bag or container. They will keep their quality for up to 2-3 months. Thaw overnight in the refrigerator.
* Ingredient Prep Ahead: You can measure out your dry ingredients the day before and store them in an airtight container. Similarly, softened butter can be achieved by leaving it out on the counter earlier in the day.
Conclusion: Indulge in the Magic of Red Velvet Cookie Bars
There you have it – a comprehensive guide to creating absolutely divine Red Velvet Cookie Bars. We’ve shown you how to achieve that signature vibrant hue and luscious texture with straightforward steps, all while offering insights to elevate your baking game. These bars are more than just a dessert; they’re a burst of joy, a moment of indulgence, and a testament to how simple ingredients can create something truly special.
Ready to bake up a storm? We encourage you to try this recipe for yourself! Share your creations with us on social media using #RedVelvetCookieBars and tag us. We’d love to see your beautiful bars and hear your feedback. For more delightful dessert recipes and baking tips, be sure to explore our other posts at [Your Blog Name/Link]. Happy Baking!
Frequently Asked Questions About Red Velvet Cookie Bars
Q1: Why are my red velvet cookie bars not vibrantly red?
A1: The intensity of the red color can depend on the type and amount of food coloring used. Gel food coloring is generally more potent than liquid. Brands also vary. You might need to adjust the amount slightly or use a higher-quality gel coloring for a more intense hue. Sometimes, the cocoa powder can subdue the color, but it’s essential for the flavor!
Q2: Can I make red velvet cookie bars without a stand mixer?
A2: Absolutely! While a stand mixer makes creaming butter and sugar easier, you can certainly achieve it with a sturdy whisk and some elbow grease, or an electric hand mixer. Ensure your butter is properly softened for the best results.
Q3: How do I get chewy red velvet cookie bars instead of cakey ones?
A3: For chewier bars, be careful not to overmix the flour and slightly underbake them according to the toothpick test (moist crumbs are good!). Using brown sugar also contributes significantly to chewiness. Ensure your butter is at the right temperature for creaming.
Q4: Can I add cream cheese frosting directly to the warm bars?
A4: It’s best to let the Red Velvet Cookie Bars cool completely before adding any frosting. Applying frosting to warm bars will cause it to melt and slide off, creating a messy, unappealing finish.
Q5: What kind of cocoa powder is best for red velvet flavor?
A5: Natural unsweetened cocoa powder is typically recommended for traditional red velvet recipes. It has a milder flavor and slightly acidic properties that can react with baking soda, contributing to the texture and color. Dutch-processed cocoa has a more intense chocolate flavor and is less acidic.
Q6: Can I use different types of chocolate chips?
A6: Yes! While semi-sweet is classic, feel free to experiment with milk chocolate, dark chocolate, or even white chocolate chips for a contrasting flavor and visual appeal. Mini chocolate chips distribute more evenly.
Q7: My bars seem greasy. What went wrong?
A7: This could be due to using too much butter or not creaming the butter and sugar sufficiently. Properly creaming incorporates air, which helps the fat distribute evenly. Ensuring the butter is softened, not melted, is also key.