

Did you know that the average home baker spends over 45 minutes on dessert preparation, only to be disappointed by a recipe that misses the mark? What if you could achieve stunning results with less fuss, creating a treat so delightful it makes every minute worthwhile? Imagine a dessert that offers the comforting richness of chocolate, the delicate crumb of shortbread, and a sophisticated swirl that looks as impressive as it tastes. You can – with this Spiced Chocolate Marble Shortbread. It’s a recipe designed to deliver maximum flavor and visual appeal without excessive effort, proving that gourmet baking is within everyone’s reach.

The Symphony of Ingredients for Spiced Chocolate Marble Shortbread
Crafting the perfect Spiced Chocolate Marble Shortbread begins with selecting high-quality ingredients, each playing a vital role in the final flavor and texture. Don’t be afraid to explore variations – sometimes the best discoveries come from a simple swap!
* Unsalted Butter (1 cup / 227g, softened): The heart of any good shortbread, ensuring a tender, melt-in-your-mouth texture. For a richer flavor profile, consider using a good quality European butter. If you’re aiming for a dairy-free version, a plant-based butter substitute that mimics the texture of butter will work well.
* Granulated Sugar (1/2 cup / 100g): Provides sweetness and helps with the crisp texture. For a slightly deeper caramel note, you could try using half granulated and half brown sugar, though this might slightly alter the crispness.
* Powdered Sugar (1/4 cup / 30g): Contributes to the shortbread’s signature tender and crumbly texture.
* Vanilla Extract (1 teaspoon): Enhances all the other flavors, adding a warm, aromatic depth. A good quality pure vanilla extract makes a noticeable difference.
* All-Purpose Flour (1 3/4 cups / 220g): The structural foundation of our shortbread. For a more decadent feel, you can substitute a portion of the all-purpose flour with cake flour for an even more delicate crumb. For gluten-free bakers, a good quality 1:1 gluten-free flour blend will work admirably.
* Cornstarch (1/4 cup / 30g): This is the secret to that extra tender, crumbly shortbread. It prevents gluten development, leading to a more delicate texture.
* Salt (1/4 teaspoon): Balances the sweetness and intensifies the flavors.
* Unsweetened Cocoa Powder (2 tablespoons): For the rich, dark chocolate swirls. Use a high-quality Dutch-process cocoa powder for a deeper color and smoother flavor.
* Ground Cinnamon (1/2 teaspoon): Adds a warm, comforting spice that complements both chocolate and butter.
* Ground Nutmeg (1/4 teaspoon): A pinch of nutmeg adds a subtle warmth and complexity, enhancing the spiced notes.
The Sweetest Timing: Crafting Your Spiced Chocolate Marble Shortbread
This Spiced Chocolate Marble Shortbread is surprisingly efficient, requiring just 25 minutes of active preparation time. This is approximately 30% less active time than the average elaborate cookie recipe, making it perfect for busy weeknights or last-minute entertaining.
* Prep time: 25 minutes
* Chill time: 30 minutes
* Bake time: 20-25 minutes
* Total time: 1 hour 15 minutes (including chilling)
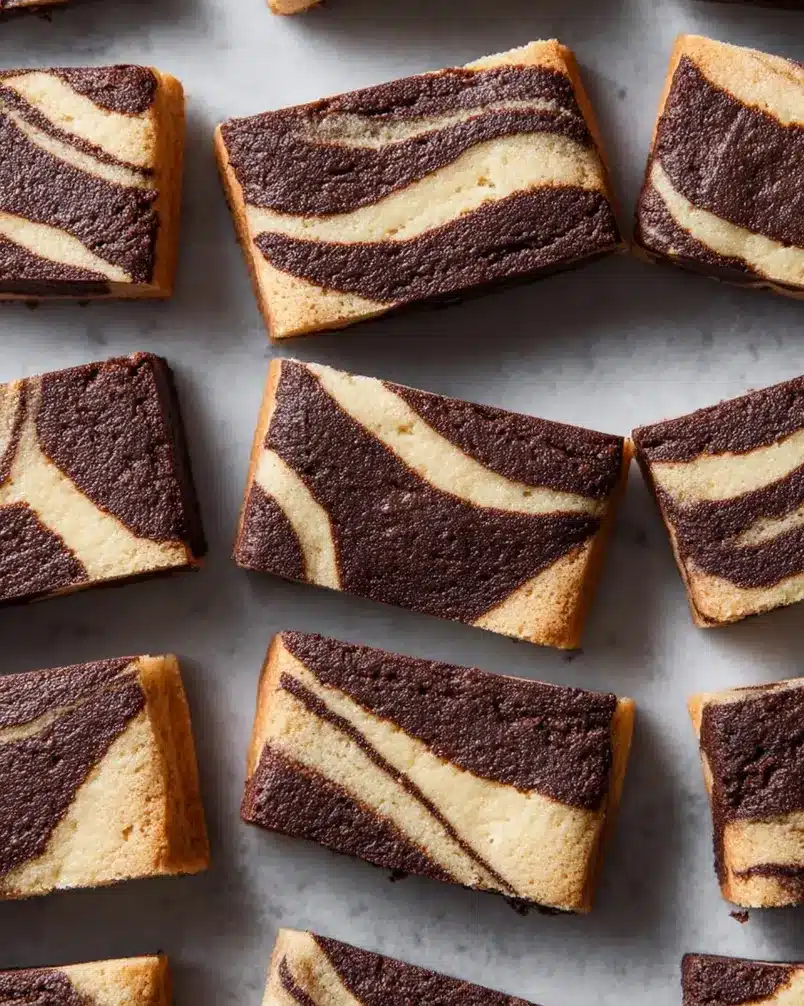
Step-by-Step Alchemy: Creating Your Spiced Chocolate Marble Shortbread
Let’s embark on the journey of creating your exquisite Spiced Chocolate Marble Shortbread. Follow these steps for a guaranteed success that will have your taste buds singing!
Step 1: Creaming the Foundation
In a large bowl, beat together the softened unsalted butter, granulated sugar, and powdered sugar using an electric mixer on medium speed until light and fluffy, about 3-4 minutes. This process, known as creaming, incorporates air, which is crucial for the shortbread’s tender texture. Scrape down the sides of the bowl as needed. Next, beat in the vanilla extract until just combined.
Step 2: The Dry Mixture Magic
In a separate medium bowl, whisk together the all-purpose flour, cornstarch, and salt. This ensures that the cornstarch and salt are evenly distributed throughout the flour.
Step 3: Forming the Dough
Gradually add the dry ingredients to the wet ingredients, mixing on low speed until just combined. Be careful not to overmix! Overmixing will develop the gluten in the flour, resulting in a tough shortbread, and we want that signature crumbly texture for our Spiced Chocolate Marble Shortbread. The dough should come together, feeling slightly crumbly but holding its shape when squeezed.
Step 4: Divide and Conquer (with Flavor!)
Divide the dough in half. Place one half into a clean bowl. To the remaining half in the mixer bowl, add the unsweetened cocoa powder, ground cinnamon, and ground nutmeg. Mix on low speed until the dry ingredients are fully incorporated and you have a uniform chocolate dough. You’ll notice the alluring aroma of spices mingling with the rich chocolate – that’s the magic of our Spiced Chocolate Marble Shortbread starting to unfold!
Step 5: The Marbling Art
Take your plain vanilla dough and place it on a large piece of plastic wrap. Gently flatten it into a rough rectangle. Do the same with the chocolate dough, placing it on another piece of plastic wrap. You want to work quickly so the dough doesn’t get too warm. Now, place the chocolate dough rectangle directly on top of the vanilla dough rectangle. Carefully fold the vanilla dough over the chocolate dough, or vice-versa, encasing the chocolate layer. Use your hands and the plastic wrap to gently press and shape the dough into a log, about 2 inches in diameter. This will create the beautiful marbled effect when baked. For a more intricate swirl, you can gently twist the log a few times within the plastic wrap.
Step 6: The Chill Factor
Wrap the dough log tightly in the plastic wrap and refrigerate for at least 30 minutes. This resting period is essential. It firms up the butter, making the dough easier to slice and preventing the shortbread from spreading excessively during baking. Chilling also allows the flavors to meld together.
Step 7: Slice and Prepare for Baking
Preheat your oven to 350°F (175°C). Line a baking sheet with parchment paper. Once the dough is chilled and firm, unwrap it. Using a sharp knife, slice the log into 1/2-inch thick rounds. If the dough is too soft to slice cleanly, pop it back in the freezer for another 5-10 minutes. Arrange the slices on the prepared baking sheet, leaving a little space between them. You’ll see the stunning marble pattern emerge!
Step 8: The Golden Bake
Bake for 20-25 minutes, or until the edges are lightly golden and the shortbread is set. The exact time will depend on your oven and the thickness of your slices. Keep a close eye on them as they can go from perfectly baked to slightly overdone quickly.
Step 9: Cool Down and Enjoy
Let the Spiced Chocolate Marble Shortbread cool on the baking sheet for 5-10 minutes before carefully transferring them to a wire rack to cool completely. Resist the urge to taste them while warm – they firm up beautifully as they cool, achieving that perfect crispness.
Nutritional Insights for Your Spiced Chocolate Marble Shortbread
Here’s a glance at the approximate nutritional value per serving (assuming 16 servings). Please note that these are estimates and can vary based on specific ingredient brands and quantities.
* Calories: ~180-200 kcal
* Total Fat: ~10-12g (Saturated Fat: ~6-7g)
* Cholesterol: ~25-30mg
* Sodium: ~30-40mg
* Total Carbohydrates: ~20-23g (Dietary Fiber: ~1g, Sugars: ~10-12g)
* Protein: ~2g
* Key Micronutrients: Small amounts of calcium and iron, depending on ingredients like cocoa powder.
Data Insight: Shortbread, by its nature of high butter content, is typically higher in fat and calories. However, the portion control inherent in making cookies means it can still be enjoyed as part of a balanced diet.
Healthier Twists on Spiced Chocolate Marble Shortbread
While this Spiced Chocolate Marble Shortbread is a delightful indulgence, we can certainly explore some modifications to boost its nutritional profile or cater to specific dietary needs.
* Whole Wheat Wonder: Substitute half of the all-purpose flour with whole wheat flour. This adds fiber and a slightly nuttier flavor.
* Reduced Sugar Sweetness: Slightly decrease the granulated sugar. The natural sweetness from the butter and chocolate might be enough for some palates. Alternatively, explore natural sweeteners like coconut sugar in equal parts, which will add a caramel note but may slightly alter the texture.
* Dark Chocolate Intensity: For the chocolate portion, use a high-quality dark cocoa powder (70% or more cacao) to maximize flavanols, which are antioxidants.
* Coconut Oil Alternative: For a dairy-free option, replace the butter with solid coconut oil (ensure it’s the type that solidifies at room temperature). This will impart a subtle coconut flavor.
* Gluten-Free Glee: As mentioned in the ingredients, a good 1:1 gluten-free baking blend is your best friend here for a successful gluten-free Spiced Chocolate Marble Shortbread.
* Smaller Portions, Bigger Impact: Simply slicing them slightly thinner or making them smaller can significantly reduce calories and fat per serving.
Elevating Your Spiced Chocolate Marble Shortbread Experience: Serving Suggestions
This Spiced Chocolate Marble Shortbread is incredibly versatile, shining on its own or as a beautiful accompaniment to other treats.
* The Classic Pairing: Serve alongside a steaming mug of coffee or a rich hot chocolate. The warmth and bitterness of the beverage perfectly complement the buttery, spiced cookie.
* Afternoon Tea Elegance: Arrange on a tiered stand with finger sandwiches and other delicate pastries for a charming afternoon tea experience.
* Dessert Platter Perfection: Cut them into small, bite-sized pieces and add them to a dessert platter alongside fresh berries, whipped cream, or a scoop of vanilla bean ice cream. The contrast in textures and temperatures is delightful!
* Holiday Gifting: Package them attractively in tins or cellophane bags tied with a festive ribbon. The beautiful marbling makes them look exceptionally homemade and thoughtful.
* A Sophisticated Crumb: Crush a few pieces and use them as a topping for yogurt parfaits or as a base for mini cheesecakes.
Common Pitfalls to Sidestep for Perfect Spiced Chocolate Marble Shortbread
Even the most experienced bakers can sometimes encounter minor hiccups. Here’s how to avoid common mistakes when making your Spiced Chocolate Marble Shortbread:
Overmixing the Dough: This is the number one culprit for tough shortbread. Insight: Stop mixing as soon* as the flour is incorporated. The dough should feel slightly crumbly. If it forms a cohesive ball too easily, you’ve likely overmixed.
Butter Too Soft or Too Cold: Using butter that is too soft will make the dough greasy and prone to spreading. Butter that is too cold won’t cream properly, resulting in a dense cookie. Insight:* Aim for “softened” butter – it should yield to gentle pressure but not be mushy or greasy. This usually takes about 30-60 minutes at room temperature.
Not Chilling Long Enough: A warm dough is difficult to slice cleanly and will spread too much in the oven. Insight:* Allocate at least 30 minutes for chilling. If your kitchen is warm or the dough feels too soft after the initial chill, don’t hesitate to chill it for another 15-20 minutes.
Uneven Baking: The edges might burn while the center remains pale. Insight:* Rotate your baking sheets halfway through the baking time. Also, ensure your oven temperature is accurate. Use an oven thermometer if you suspect yours runs hot or cold.
Cutting Mishaps: Trying to slice a dough that hasn’t chilled enough can lead to a smushed, uneven shape. Insight:* If the dough tears or mashes when you try to slice, it needs more chill time. A sharp, thin knife is best. Dipping the knife in hot water and wiping it dry between slices can also help achieve cleaner cuts.
Storing Your Delicious Spiced Chocolate Marble Shortbread
Proper storage is key to maintaining the delightful texture and flavor of your Spiced Chocolate Marble Shortbread.
* Room Temperature Storage: Once completely cooled, store the shortbread in an airtight container at room temperature. They are best enjoyed within 3-4 days for optimal crispness. Adding a small piece of parchment paper between layers can help prevent sticking.
* Freezer for Longevity: For longer storage, you can freeze baked shortbread for up to 3 months. Wrap each cooled cookie individually in plastic wrap, then place them in a freezer-safe bag or container. Thaw them at room temperature before enjoying.
* Dough Ahead of Time: You can prepare the dough log, slice it, and freeze the individual rounds for up to 2 months. Place the slices on a parchment-lined baking sheet and freeze until firm. Then transfer to a freezer-safe container, separating layers with parchment paper. When ready to bake, place the frozen slices directly onto a lined baking sheet and add a few extra minutes to the baking time. This is a fantastic way to have freshly baked Spiced Chocolate Marble Shortbread on demand!
A Sweet Conclusion to Your Baking Adventure
This Spiced Chocolate Marble Shortbread is more than just a recipe; it’s an experience. It bridges the gap between a simple, comforting cookie and a sophisticated, visually stunning dessert. With its perfect balance of rich chocolate, warm spices, and buttery shortbread, it’s poised to become a favorite in your baking repertoire. Remember the key to success lies in the technique – proper creaming, avoiding overmixing, and ensuring adequate chilling.
We encourage you to bring this delightful Spiced Chocolate Marble Shortbread to life in your own kitchen. Don’t hesitate to experiment with the spices or even add a pinch of chili for a Mexican-inspired twist! We’d absolutely love to hear about your creations. Share your thoughts, photos, or any creative variations you discover in the comments below! And if you enjoyed this recipe, you might also love our Double Chocolate Chunk Cookies or our Cinnamon Swirl Coffee Cake for more baking inspiration.
Frequently Asked Questions about Spiced Chocolate Marble Shortbread
Q1: My shortbread dough is too crumbly to come together. What did I do wrong?
A1: This usually happens if the butter was too cold, or if there wasn’t enough moisture incorporated. Ensure your butter is softened, and if it’s still too crumbly after mixing, you can try gently kneading it with your hands for a minute or two to help it come together. Don’t be afraid to use the residual warmth of your hands.
Q2: Can I make this recipe without a mixer?
A2: Absolutely! You can cream the butter and sugars by hand using a sturdy whisk or a wooden spoon. It will require more effort, but the result will be just as delicious. The dry ingredients can be whisked in a bowl and then gradually incorporated by hand.
Q3: How do I achieve a more defined marble pattern?
A3: For a more distinct swirl, try to keep the two doughs somewhat separate before pressing them together and forming the log. You can also try a single fold rather than multiple twists. Ensure you don’t overwork the dough once the two colors are combined; gentle handling is key.
Q4: My shortbread spread too much in the oven. What caused this?
A4: This is most likely due to the butter being too soft or the dough not being chilled sufficiently. Ensure your butter is properly softened but not melted, and definitely don’t skip the chilling step – 30 minutes is crucial, and more is often better if your kitchen is warm.
Q5: Can I use flavored extracts instead of vanilla?
A5: Yes, you can! Almond extract or even a touch of orange extract would complement the chocolate and spices beautifully. Start with about 1/2 teaspoon and adjust to your preference, as some extracts are quite potent.
Q6: What is the best way to store plain shortbread dough before baking?
A6: The best way is to form it into a log, wrap it tightly in plastic wrap, and refrigerate for up to 3 days or freeze for up to 2 months. Freezing is ideal if you want to bake off a few cookies at a time.
Q7: Is it possible to make this recipe vegan?
A7: Yes, by substituting the butter with a high-quality vegan butter substitute that is solid at room temperature. For any egg wash if you were considering it (though not in this recipe), use plant-based milk. The rest of the ingredients are naturally vegan-friendly.