

The Golden Secret: Is the Danish Kringle Destined for Your Recipe Book?
Did you know that a single slice of authentic Danish Kringle can transport your taste buds to the heart of Denmark, offering a delightful symphony of flaky pastry and rich filling? It’s true! Many home bakers shy away from this iconic pastry, believing it’s a complex feat reserved for professional patisseries. But what if I told you that achieving that perfect, buttery crunch and sweet, irresistible filling is more attainable than you think? This guide will demystify the art of the Danish Kringle, transforming you into a confident baker ready to impress.

Ingredients for Your Danish Kringle Masterpiece
Gathering the right ingredients is the first step to unlocking the magic of a truly exceptional Danish Kringle. We’ve curated a list that emphasizes quality and offers flexibility, ensuring you can create a stunning pastry, even if a specific item is out of reach.
For the Dough (Laminated Pastry):
* 2 ½ cups All-Purpose Flour, plus more for dusting: The foundation of our delicate layers. Look for a good quality, unbleached flour for best results.
* 1 teaspoon Granulated Sugar: A touch of sweetness to balance the dough.
* ½ teaspoon Salt: Enhances flavor and strengthens gluten development.
* 1 cup (2 sticks) Unsalted Butter, very cold and cut into ½-inch cubes: Crucial for creating those distinct flaky layers. Ensure it’s well-chilled to prevent it from melting too early.
Substitution Note: While unsalted butter is preferred for controlling salt levels, you could* use salted butter, simply reducing the added salt in the dough by ¼ teaspoon.
* ½ cup Ice Water: This cold liquid helps keep the butter solid during the layering process.
For the Filling (Classic Cream Cheese & Almond):
* 8 ounces Cream Cheese, softened: Provides a rich, tangy base. Full-fat cream cheese will yield the creamiest result.
* ½ cup Powdered Sugar: For a smooth, sweet filling.
* 1 large Egg Yolk: Adds richness and helps bind the filling.
* 1 teaspoon Vanilla Extract: Enhances the sweet aromas.
* ½ cup Sliced Almonds, lightly toasted: For that signature nutty crunch. Toasting them brings out their full flavor.
* Substitution Note: Pecans or chopped walnuts are excellent alternatives if almonds aren’t your preference.
* ¼ cup Apricot Jam or Preserves, warmed and strained: Adds a beautiful fruity sheen and subtle sweetness.
* Substitution Note: Raspberry or cherry jam can also be used for a different flavor profile.
For the Glaze:
* ½ cup Powdered Sugar
* 1-2 tablespoons Milk or Cream
* ½ teaspoon Vanilla Extract
Timing Your Danish Kringle Creation
Crafting the perfect Danish Kringle requires patience, but with this breakdown, you’ll be able to plan your baking like a pro.
* Active Preparation Time: Approximately 60 minutes (spread over two days due to chilling). This includes mixing, shaping, and filling.
* Chilling Time: 12-24 hours. This is essential for the dough to properly relax and the butter to firm up, ensuring distinct layers.
* Baking Time: 20-25 minutes. The aroma of your delicious creation will fill your kitchen!
* Total Time: 13 to 25 hours (largely hands-off). This might seem lengthy, but 90% of the time is dedicated to chilling, making it a manageable bake over two days—significantly less intimidating than some complex pastries!
Step-by-Step Instructions: Crafting Your Danish Kringle
Let’s begin the journey to your delectable Danish Kringle. Follow these steps closely, and you’ll be rewarded with a bakery-worthy treat.
Step 1: Assemble the Dough Base
In a large bowl, whisk together the flour, sugar, and salt. Add the cold, cubed butter. Using a pastry blender, your fingertips, or a food processor, cut the butter into the flour until the mixture resembles coarse crumbs with some larger, pea-sized pieces of butter remaining. This is key for flakiness! Gradually add the ice water, mixing until the dough just comes together. Be careful not to overmix. Turn the dough out onto a lightly floured surface, gently form it into a rough rectangle, wrap it tightly in plastic wrap, and refrigerate for at least 1 hour.
Step 2: The Art of Lamination (Folding the Butter)
This is where the magic happens. Unwrap the chilled dough and place it on a lightly floured surface. Roll the dough into a rectangle approximately 12×18 inches. Dot half of the dough’s surface with softened butter (ensure it’s still firm but spreadable). Fold the other half of the dough over the butter like a book. Pinch the edges to seal. Gently roll this package into a long rectangle again. Perform a “letter fold”: fold the bottom third of the dough up, then fold the top third down. Wrap tightly and refrigerate for at least 30 minutes. Repeat this rolling, folding, and chilling process two more times, for a total of three “turns.” This layering technique is what makes the Danish Kringle so wonderfully flaky.
Step 3: Prepare the Irresistible Filling
While the dough is chilling its final rest, prepare the filling. In a medium bowl, beat the softened cream cheese and powdered sugar until smooth and creamy. Beat in the egg yolk and vanilla extract until well combined. Fold in the toasted sliced almonds. Set aside.
Step 4: Shape Your Danish Kringle
On a lightly floured surface, roll out the chilled dough into a large rectangle, approximately 10×15 inches and about ¼ inch thick. Trim any uneven edges. Spread the cream cheese and almond filling evenly over the dough, leaving a ½-inch border along the edges. Dollop the warmed and strained apricot jam over the filling. Now, carefully roll up the dough tightly, starting from one of the long sides, like a jelly roll. Pinch the seam to seal. Gently shape the roll into your desired form – typically a ring or an oval, pinching the ends together if making a ring. Place the shaped dough onto a baking sheet lined with parchment paper.
Step 5: The Final Chill and Bake
Cover the shaped Danish Kringle loosely with plastic wrap and refrigerate for at least another 30 minutes (or up to 24 hours). This allows the dough to relax further and firms up the layers before baking, preventing butter leakage. Preheat your oven to 375°F (190°C). Bake for 20-25 minutes, or until the pastry is golden brown and puffed.
Step 6: Glaze and Enjoy!
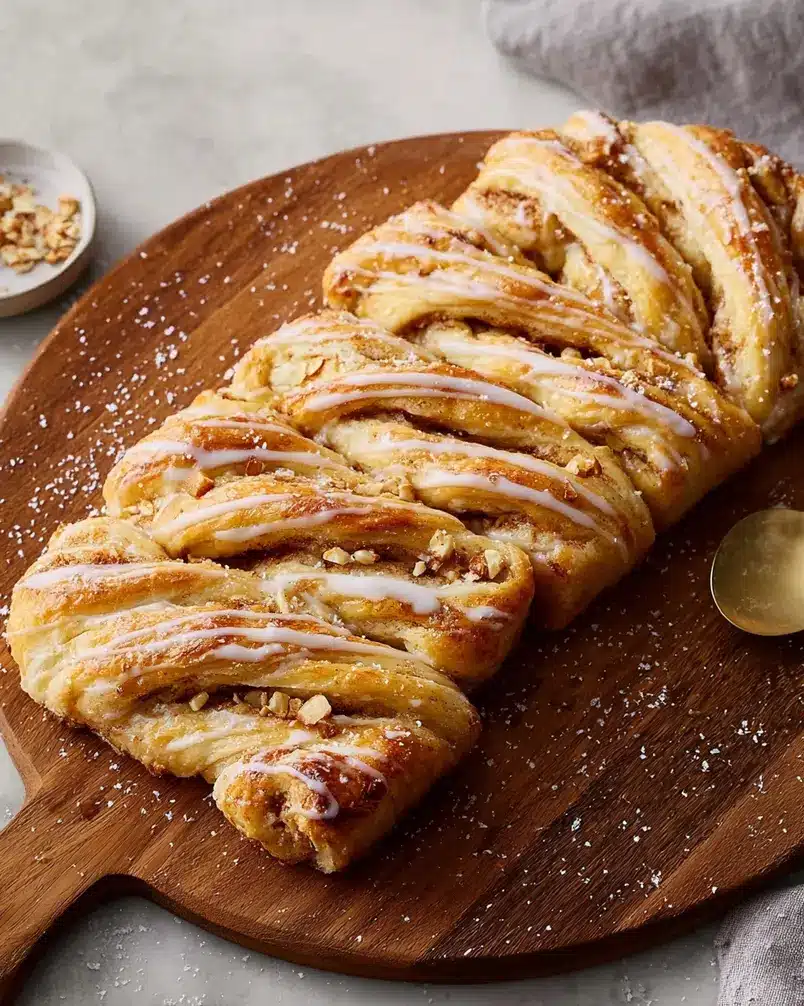
While the Kringle is still warm, whisk together the glaze ingredients: powdered sugar, milk/cream, and vanilla extract until smooth. Drizzle generously over the warm Danish Kringle. Let it cool slightly before slicing and serving.
Nutritional Insights for Your Danish Kringle Slice
Understanding the nutritional makeup of your homemade Danish Kringle can help you enjoy it mindfully. A typical serving (approximately 1/12th of the Kringle) offers:
* Calories: ~350-450 kcal (Varies based on exact ingredients and serving size)
* Protein: ~5-7g
* Total Fat: ~20-30g (Rich in butter and cream cheese fats)
* Saturated Fat: ~10-15g
* Carbohydrates: ~35-45g
* Sugars: ~20-25g (From dough, filling, and glaze)
* Fiber: ~1-2g
Data Insight: While traditional pastries like the Danish Kringle are celebratory treats, enjoying them in moderation as part of a balanced diet is key. The rich flavor means a small portion can be incredibly satisfying!
Healthier Alternatives for Your Danish Kringle
We believe everyone should be able to enjoy the delight of a Danish Kringle, so here are some ideas to make it a bit lighter without sacrificing taste:
* Whole Wheat Flour: Substitute half of the all-purpose flour with whole wheat pastry flour for added fiber and nutrients.
* Reduced-Fat Cream Cheese: For a lighter filling, opt for reduced-fat cream cheese, though the texture might be slightly less rich.
* Sweetener Alternatives: Consider using a sugar substitute like erythritol or stevia for the filling and glaze, adjusting quantities as per product instructions.
* Nut-Free Filling: If you have nut allergies, omit the almonds and consider adding a touch of cinnamon or cardamom to the cream cheese filling for warmth and flavor.
* Fruit-Focused Filling: Increase the amount of fruit jam and reduce the cream cheese portion for a more fruit-forward, less rich filling.
* Vegan Danish Kringle: This is a more advanced adaptation and requires specific vegan butter substitutes designed for lamination and plant-based cream cheese alternatives.
Serving Suggestions to Elevate Your Danish Kringle
Your beautiful Danish Kringle deserves to be savored to its fullest! Here are some ways to enhance the experience:
* Morning Delight: Serve warm slices with a cup of freshly brewed coffee or a creamy latte. The bitterness of the coffee perfectly complements the sweetness of the Kringle.
* Afternoon Tea: A classic pairing! Enjoy a slice with a pot of Earl Grey or your favorite herbal tea.
* Dessert Extravaganza: Elevate it further by serving a slice with a dollop of freshly whipped cream or a scoop of vanilla bean ice cream. A drizzle of extra jam or a scattering of toasted nuts adds visual appeal.
* Personalized Presentation: For a festive touch, dust with powdered sugar using a doily as a stencil or arrange fresh berries around the slice.
Common Mistakes to Avoid When Baking Danish Kringle
Even experienced bakers can encounter hiccups. Here are some common pitfalls when making Danish Kringle and how to sidestep them:
Butter is Too Warm: If your butter is too soft when you start lamination, it will absorb into the dough instead of creating distinct layers. Always ensure your butter and water are very* cold.
Overworking the Dough: Too much kneading develops gluten excessively, leading to a tough pastry. Mix until just* combined, and be gentle during rolling.
* Skipping the Chilling Steps: The chilling periods are non-negotiable for a flaky Danish Kringle. They allow the gluten to relax and the butter to re-firm, preventing the layers from merging.
* Not Sealing the Filling: Ensure your filling is contained within the rolled dough. If it leaks out during baking, it can lead to a dry Kringle. Pinch seams well.
* Cutting Too Soon: Allow the Kringle to cool slightly before slicing. This helps the structure set, preventing it from falling apart.
Storing Tips for Your Delicious Danish Kringle
Proper storage ensures your Danish Kringle remains a delightful treat:
* Room Temperature: Once cooled, an airtight container at room temperature will keep your Kringle fresh for up to 2 days. The glaze can sometimes become slightly sticky, so ensure adequate cooling.
* Refrigeration: For longer storage (up to 4-5 days), wrap the Kringle tightly in plastic wrap and then in foil or store in an airtight container in the refrigerator. This will help maintain its freshness, but the pastry may lose some of its crispness.
* Freezing: For long-term storage, wrap the completely cooled Kringle tightly in plastic wrap, then in aluminum foil, and finally in a freezer bag. It can be frozen for up to 2-3 months. Thaw overnight in the refrigerator before bringing to room temperature to enjoy.
* Reheating: To revive a slightly stale Kringle or regain some crispness, gently warm slices in a 300°F (150°C) oven for 5-8 minutes.
The Sweet Conclusion: Your Danish Kringle Journey Begins!
You’ve now unlocked the secrets to creating a truly magnificent Danish Kringle! From understanding the delicate lamination process to mastering the art of the filling and glaze, this recipe proves that classic pastries are within your reach. This isn’t just a recipe; it’s an invitation to create delicious memories and share them with loved ones.
Ready to embark on this rewarding baking adventure? Give this Danish Kringle recipe a try! We’d love to hear about your experience. Share your successes, any creative twists you’ve added, or your favorite filling variations in the comments below. For more delightful pastry recipes, explore our related guides on [Scandinavian Baking Classics](link_to_scandinavian_baking_post) or [Easy Pastry Techniques for Beginners](link_to_pastry_techniques_post). Happy Baking!
Frequently Asked Questions About Danish Kringle
Here are some common questions about baking and enjoying the Danish Kringle:
1. Can I make the dough ahead of time?
Absolutely! The dough benefits from chilling. You can prepare the dough up to the “three turns” and refrigerate it for up to 24 hours before proceeding with shaping and filling. This makes the process more manageable.
2. My Kringle didn’t turn out as flaky as I expected. What went wrong?
The most common reason for a lack of flakiness in Danish Kringle is warm butter or overworking the dough. Ensure your butter is very cold and firm when you begin lamination, and handle the dough gently. Also, ensure you’ve completed all the recommended chilling periods.
3. Is it possible to freeze unenriched Danish Kringle dough?
Yes, you can freeze the dough after completing the lamination and chilling turns. Wrap it very well and thaw it in the refrigerator overnight before shaping and baking.
4. How can I make my Danish Kringle look more professional?
Beyond the glaze, you can ensure evenly rolled dough, a tight roll for an even shape, and careful placement on the baking sheet. Baking until evenly golden brown also contributes to a professional look. Practice makes perfect!
5. What are the authentic Danish Kringle fillings?
While cream cheese and almond is a beloved classic, authentic Danish Kringle can feature marzipan, fruit compotes (like cherry or apple), or even savory fillings. The recipe provided offers a widely popular and delicious option.