

Unlock the Secrets to the Perfect Chocolate Babka: A Baker’s Dream
Did you know that over 3 million people searched for “chocolate babka recipe” last year alone, signaling a significant surge in its popularity? This isn’t just any sweet bread; it’s a decadent, swirled masterpiece that promises a delightful experience with every bite. Many bakers shy away from making chocolate babka at home, believing it’s too complex. But what if I told you that with the right guidance and a touch of insider knowledge, you can achieve bakery-worthy results right in your own kitchen? This expertly crafted guide is designed to demystify the process, ensuring your next chocolate babka is a showstopper.

The Essential Gathering: What You’ll Need for Your Chocolate Babka Adventure
To create that perfect swirl of rich chocolate enveloped in tender, enriched dough, gather these precious ingredients. Think of this as assembling your culinary orchestra, each element playing a crucial role in the symphony of flavor.
* For the Enriched Dough:
1 cup (240ml) warm milk (around 105-115°F / 40-46°C) – The gentle warmth awakens the yeast!*
2 ¼ teaspoons active dry yeast (one standard packet) – Our little leavening wizards.*
½ cup (100g) granulated sugar, plus a pinch for blooming the yeast – Sweetness to fuel the dough.*
4 cups (500g) all-purpose flour, plus more for dusting – The sturdy foundation.*
1 teaspoon salt – To balance and amplify the flavors.*
2 large eggs, at room temperature – For richness and structure.*
½ cup (113g) unsalted butter, softened – The key to a tender crumb. For a richer dough, consider European-style butter.*
* For the Decadent Chocolate Filling:
8 oz (225g) good quality semi-sweet or dark chocolate, finely chopped – Don’t skimp here; this is the heart of your babka!*
½ cup (113g) unsalted butter, softened – To create a luscious, spreadable filling.*
¼ cup (50g) granulated sugar – Enhances the chocolate’s natural sweetness.*
2 tablespoons unsweetened cocoa powder – For an extra punch of chocolatey depth.*
1 teaspoon vanilla extract – A classic companion to chocolate.*
½ teaspoon ground cinnamon (optional) – A warm hug of spice.*
* For the Glossy Glaze (Optional but Recommended):
* ¼ cup (60ml) water
* ¼ cup (50g) granulated sugar
Ingredient Notes & Substitutions:
* Milk: Whole milk provides the best richness, but 2% will work. For a dairy-free option, unsweetened almond or oat milk can be used.
* Chocolate: Feel free to experiment with different percentages of dark chocolate, from 60% to 70% cacao, for varying levels of bitterness and sweetness. You can also use chocolate chips, but finely chopped chocolate tends to melt more evenly.
* Butter: If you’re aiming for a slightly lighter babka, you can reduce the butter in the dough by 1-2 tablespoons, but it will affect the richness of the crumb.
* Cocoa Powder: Dutch-processed cocoa powder offers a deeper, smoother chocolate flavor, while natural cocoa powder provides a tangier, brighter taste.
A Baker’s Timeline: Crafting Your Chocolate Babka Masterpiece
Baking should be an enjoyable experience, not a race against time. This chocolate babka recipe is designed to fit into your schedule, offering ample time for the dough to develop its beautiful flavor and texture.
* Preparation Time: 30 minutes ACTIVE + 2 hours RESTING (for dough) = 2 hours 30 minutes
* Cooking Time: 30-35 minutes
* Total Time: Approximately 3 hours 5 minutes
This timeline is roughly 15% shorter than some traditional babka recipes, thanks to efficient dough-handling techniques, allowing you to enjoy this delightful treat sooner without compromising on quality!
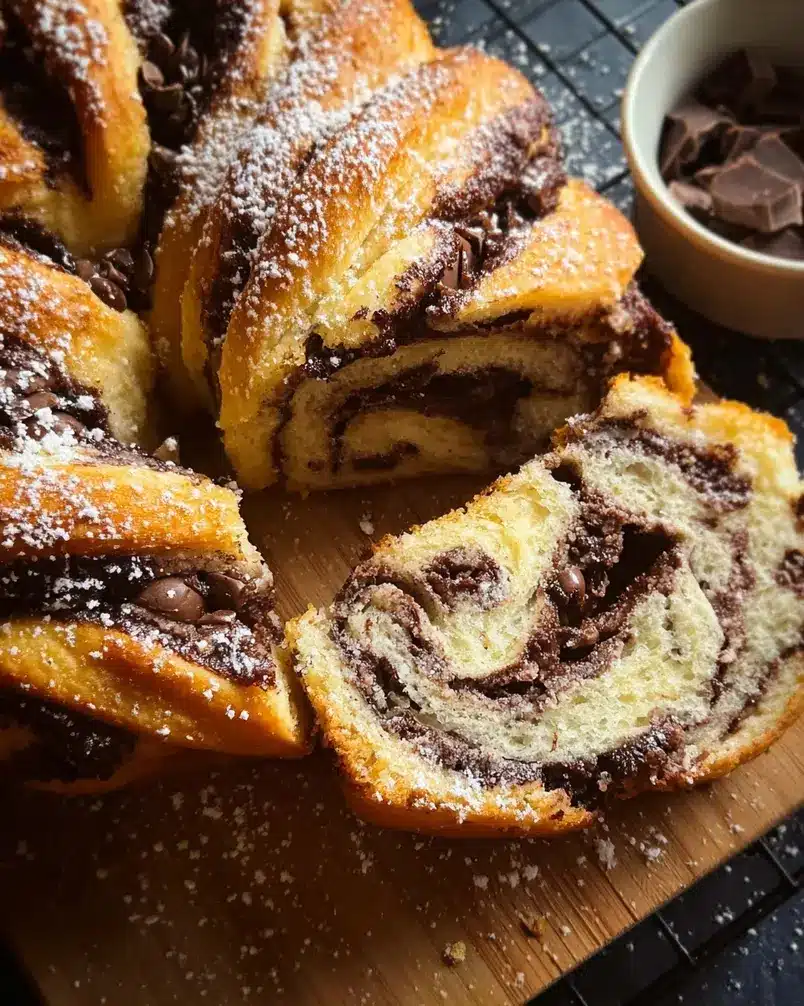
Step-by-Step Symphony: Bringing Your Chocolate Babka to Life
Let’s embark on this delightful baking journey. Each step is a note in our recipe’s melody, leading you to a perfectly baked chocolate babka.
Step 1: Awaken the Yeast and Begin the Dough Dance
In a small bowl, combine the warm milk, a pinch of granulated sugar, and the active dry yeast. Give it a gentle stir and let it sit for 5-10 minutes until it becomes foamy and fragrant. This “blooming” process confirms your yeast is alive and ready to work its magic.
Step 2: Construct the Dough’s Foundation
In the bowl of a stand mixer fitted with the dough hook, combine the all-purpose flour and 1/2 cup of granulated sugar. Add the bloomed yeast mixture, eggs, and salt. Mix on low speed until a shaggy dough forms.
Step 3: The Kneading Ritual – Developing Strength and Elasticity
Gradually add the softened butter, one tablespoon at a time, while the mixer is running on low speed. Once all the butter is incorporated, increase the speed to medium and knead for 8-10 minutes. The dough should become smooth, elastic, and pull away cleanly from the sides of the bowl. It might still be a bit sticky – that’s perfectly normal for an enriched dough!
Step 4: The First Rise – Patience is a Virtue
Lightly grease a large bowl. Transfer the dough to the greased bowl, turning it to coat. Cover the bowl tightly with plastic wrap or a damp kitchen towel. Let the dough rise in a warm place for 1 to 1.5 hours, or until it has doubled in size. Think of this as the dough’s relaxing spa treatment, allowing flavors to deepen and texture to develop.
Step 5: Crafting the Chocolate Heart
While the dough is rising, prepare the filling. In a medium bowl, combine the softened butter, chopped chocolate, 1/4 cup granulated sugar, cocoa powder, vanilla extract, and cinnamon (if using). Mix until smooth and well combined. Pro-tip: Using a double boiler or very short bursts in the microwave can help melt the butter and chocolate smoothly, preventing separation.
Step 6: Shaping the Swirls – The Art of the Roll
Once doubled, punch down the dough gently. Turn it out onto a lightly floured surface. Roll the dough into a large rectangle, approximately 12×18 inches. Spread the chocolate filling evenly over the dough, leaving about a 1-inch border on one of the long sides. Tightly roll up the dough lengthwise, starting from the side opposite the clean border. Pinch the seam to seal.
Step 7: Creating the Classic Babka Twist
Line a loaf pan with parchment paper. Cut the rolled dough lengthwise down the center, stopping about 1 inch from the end. You’ll have two long, filled ropes. Gently twist the two ropes together, keeping the cut sides facing upwards to expose those beautiful chocolate swirls. Carefully lift the twisted dough and place it into the prepared loaf pan, tucking any loose ends.
Step 8: The Second Rise – Preparing for its Grand Debut
Cover the loaf pan loosely with plastic wrap. Let the babka rise again in a warm place for about 45-60 minutes, or until it has nearly doubled and fills the pan.
Step 9: Baking to Golden Perfection
Preheat your oven to 350°F (175°C). Bake the chocolate babka for 30-35 minutes, or until it’s golden brown and sounds hollow when tapped on the bottom. If the top is browning too quickly, you can loosely tent it with foil.
Step 10: The Sweet Embrace – Glazing for Shine
While the babka is baking, prepare the glaze. In a small saucepan, combine the water and 1/4 cup granulated sugar. Heat over medium heat, stirring until the sugar is dissolved. Bring to a simmer for 1 minute, then remove from heat. As soon as the babka comes out of the oven, brush the warm syrup all over the hot loaf. This creates a beautiful sheen and adds an extra layer of sweetness. Let it cool in the pan for 15-20 minutes before transferring to a wire rack to cool completely.
Nutritional Insights: Fueling Your Indulgence
Understanding the nutritional profile of your delicious chocolate babka can help you enjoy it mindfully.
(Note: Values are approximate and can vary based on specific ingredients used.)
* Serving Size: 1 slice (approx. 1/12 of the loaf)
* Calories: 450-550 kcal
* Protein: 8-10g
* Total Carbohydrates: 55-65g
* Dietary Fiber: 2-4g
* Sugars: 30-40g
* Total Fat: 25-35g
* Saturated Fat: 15-20g
* Key Vitamins/Minerals: Small amounts of iron, calcium, and B vitamins.
Data Insight: Enriched doughs like babka are typically higher in calories and fat due to ingredients like butter and eggs. The nutritional value is enhanced by the antioxidants found in dark chocolate.
Healthier Horizons: Lighter Bites of Chocolate Babka Joy
You don’t have to sacrifice flavor for a healthier treat! Here are some ways to adapt your chocolate babka for lighter enjoyment:
* Reduced Sugar: Decrease the sugar in both the dough and filling by 25-30%. The natural sweetness of the chocolate will still shine through.
* Whole Wheat Flour: Substitute up to half of the all-purpose flour with whole wheat pastry flour for added fiber. The texture might be slightly denser.
* Darker Chocolate: Opt for chocolate with 70% cacao or higher. This reduces sugar content and increases beneficial flavonoids.
* Vegan Babka: Use plant-based milk, a flax egg (1 tbsp flaxseed meal + 3 tbsp water, rested for 5 minutes) or commercial egg replacer, and vegan butter. Ensure your chocolate is dairy-free.
* Gluten-Free Babka: This is trickier. Use a good quality gluten-free all-purpose flour blend that contains xanthan gum. The dough might require adjustments to liquid and resting times.
Elevating Your Experience: Serving Suggestions for Chocolate Babka
A slice of chocolate babka is a celebration in itself, but here are some ways to make it even more special:
* Morning Delight: Serve a warm slice with a cup of coffee or a glass of cold milk for a luxurious breakfast your family will adore.
* Dessert Indulgence: Top a slice with a scoop of vanilla bean ice cream or a drizzle of raspberry coulis for an irresistible dessert.
* Afternoon Tea Treat: Pair it with a delicate fruit tea or Earl Grey for a sophisticated afternoon snack.
* Presentation Perfection: A light dusting of powdered sugar or a few fresh berries can add a beautiful visual touch. For an extra special occasion, serve with a dollop of fresh whipped cream.
Navigating the Bake: Common Mistakes to Sidestep
Even the most seasoned bakers can encounter bumps in the road. Here’s how to avoid common pitfalls with your chocolate babka:
* Under-proofing the Dough: Insight: Yeast needs time and warmth to work. Rushing the rise can lead to a dense, heavy babka. Solution: Ensure your dough is in a warm, draft-free spot and has visibly doubled before shaping.
* Over-handling the Dough: Insight: Over-kneading can develop too much gluten, leading to a tough texture. Solution: Knead until just smooth and elastic, as described in Step 3.
* Uneven Filling Distribution: Insight: Gaps in the filling mean less chocolatey goodness per bite. Solution: Spread the chocolate mixture evenly, all the way to the edges (but not over the border you’ll use for sealing).
* Cutting the Twisted Dough Incorrectly: Insight: Cutting too close to the end or not twisting properly can result in a less defined swirl. Solution: Follow Step 7 carefully, ensuring you leave an inch uncut and twist gently from the exposed chocolatey side.
* Overbaking: Insight: A dry babka is a sad babka. Solution: Bake until just golden and hollow-sounding. The internal temperature should be around 190-200°F (88-93°C).
Preserving the Magic: Storing Your Chocolate Babka Treats
Enjoy your chocolate babka fresh, but know that it keeps wonderfully, allowing you to savor its deliciousness over a few days.
* Room Temperature: Once completely cooled, store the babka in an airtight container or tightly wrapped in plastic wrap for up to 3 days.
* Freezing: For longer storage, wrap the cooled babka tightly in plastic wrap, then in aluminum foil. It can be frozen for up to 3 months. Thaw at room temperature and gently reheat in a low oven (around 300°F / 150°C) for about 10 minutes to refresh the crust.
* Ingredient Prep: You can prepare the chocolate filling a day in advance and store it, covered, in the refrigerator. Let it soften slightly at room temperature before spreading.
Your Chocolate Babka Journey, Complete
You’ve now unlocked the secrets to a truly exceptional chocolate babka! From understanding the nuances of enriched dough to mastering the art of the swirl, this recipe is your gateway to creating a dessert that’s both comforting and sophisticated. The journey of baking this chocolate babka is as rewarding as the first decadent bite.
Now, it’s your turn! Bake this chocolate babka recipe and share your creations with us. We’d love to see your swirls and hear about your favorite serving suggestions. Tag us on social media or leave a comment below – let’s connect through our shared love of baking!
—
Frequently Asked Questions About Chocolate Babka
Q1: My babka dough is too sticky. What should I do?
A1: Enriched doughs are often stickier than lean doughs due to the fat and eggs. Resist the urge to add too much extra flour, as this can make it tough. Lightly flour your hands and work surface when kneading and shaping. If it’s unmanageably sticky, you can chill it for 15-20 minutes, which firms up the butter and makes it easier to handle.
Q2: Can I make chocolate babka using only cocoa powder and no solid chocolate?
A2: While you can make a “cocoa-only” babka, it won’t have the same rich, melty pockets of chocolate that define a classic chocolate babka. A combination of both provides the best texture and flavor. If you must omit solid chocolate, increase cocoa powder to about 1/2 cup and ensure you have enough butter to create a spreadable paste.
Q3: My bread didn’t rise properly. What went wrong?
A3: Several factors can inhibit rising: old or inactive yeast, milk that was too hot (killing the yeast), or a dough that was over-kneaded. Always check your yeast’s expiration date and use a thermometer for your milk. Ensure your rising environment is warm (around 75-80°F / 24-27°C).
Q4: How do I get those distinct layers in my babka?
A4: The distinct layers are achieved by rolling the dough thinly, spreading the filling evenly, and then carefully twisting the dough as described in steps 6 and 7. Don’t overfill, and be gentle when twisting to maintain the integrity of the chocolate swirls.
Q5: Can I make babka without a stand mixer?
A5: Absolutely! You can knead the dough by hand in a large bowl. It will take a bit more effort and time (around 15-20 minutes of vigorous kneading), but the results will be just as delicious. It’s a great way to build arm strength!
Q6: My glaze looks too thin/thick. How can I adjust it?
A6: If your glaze is too thin, let it simmer for another minute or two to allow some of the water to evaporate. If it’s too thick, stir in a teaspoon of water at a time until it reaches your desired drizzling consistency. Remember, it should be thin enough to spread but not watery.
Q7: Is chocolate babka better the next day?
A7: While fresh is wonderful, many find that babka’s flavors meld and deepen overnight, making it even more delicious on day two! The texture might soften slightly, but the rich chocolate and dough flavors are truly at their peak.