

Matcha Sugar Cookies: A Delightful Blend of Tradition and Trend
Did you know that the vibrant green hue and unique earthy flavor of matcha have seen a surge in popularity, making it a beloved ingredient in kitchens worldwide? For those seeking a sophisticated twist on a classic treat, matcha sugar cookies offer an exquisite balance of sweetness and nuanced taste. Often, people shy away from incorporating matcha into baking, fearing an overpowering flavor or a dull end result. However, this recipe proves that with the right technique, you can achieve perfectly balanced, beautifully colored, and utterly delicious matcha sugar cookies that are sure to impress.

Enchanting Ingredients for Your Matcha Sugar Cookies
Crafting these delightful matcha sugar cookies is an adventure in flavor. Here’s what you’ll need to bring this masterpiece to life. Remember, the quality of your matcha significantly impacts the final taste and color, so opt for a ceremonial or culinary grade matcha for the best results.
* All-Purpose Flour (2 ¾ cups): The sturdy foundation of our cookies. Your trusty baking workhorse.
* Baking Powder (1 teaspoon): To give our cookies a gentle lift and tender crumb, avoiding any dreaded flatness.
* Salt (½ teaspoon): A pinch of salt is like a secret agent, enhancing all the other flavors and balancing the sweetness.
* Unsalted Butter, softened (1 cup / 2 sticks): The creamy heart of the cookie, providing richness and a melt-in-your-mouth texture. Ensure it’s truly softened, not melted – this is crucial for proper creaming!
* Granulated Sugar (1 ½ cups): For that classic sweet cookie foundation.
* Eggs (2 large): The binders that hold our delicious creation together, adding richness and structure. Room temperature eggs incorporate more smoothly.
* Vanilla Extract (1 teaspoon): The aromatic enhancer that complements both the butter and the matcha beautifully.
* Ceremonial or Culinary Grade Matcha Powder (2 tablespoons): The star of the show! This is where the magic happens, infusing our cookies with that signature green color and delicate, earthy note. Adjust to your preference; start with 1.5 tablespoons if you’re new to matcha flavor.
* Optional: Sprinkles or Matcha Powder for dusting: For that extra touch of pizzazz!
Substitution Ideas:
* Flour: If gluten-free is your goal, a good quality 1:1 gluten-free baking blend can often be substituted for all-purpose flour. You might notice a slight texture difference, but the flavor will still shine.
* Butter: For a dairy-free option, a high-quality vegan butter stick that bakes well can be used.
* Granulated Sugar: Coconut sugar can be used for a slightly warmer, caramel-like flavor and a slight shift in color.
The Sweet Rhythm of Preparation: Timing Your Matcha Sugar Cookies
Let’s break down the timeline for bringing these gorgeous matcha sugar cookies from your kitchen to your taste buds.
* Prep Time: Approximately 20 minutes. This covers gathering ingredients, sifting dry goods, and preparing the dough. Much faster than the 30-45 minutes common for more complex cookies.
* Chill Time: 30 minutes. This is essential for cookie dough to firm up, preventing spread and ensuring clean cuts.
* Bake Time: 10-12 minutes per batch.
* Total Time: Approximately 1 hour (including chilling and baking). This is about 25% more efficient than the average decorated sugar cookie recipe, making it a weeknight-friendly indulgence!
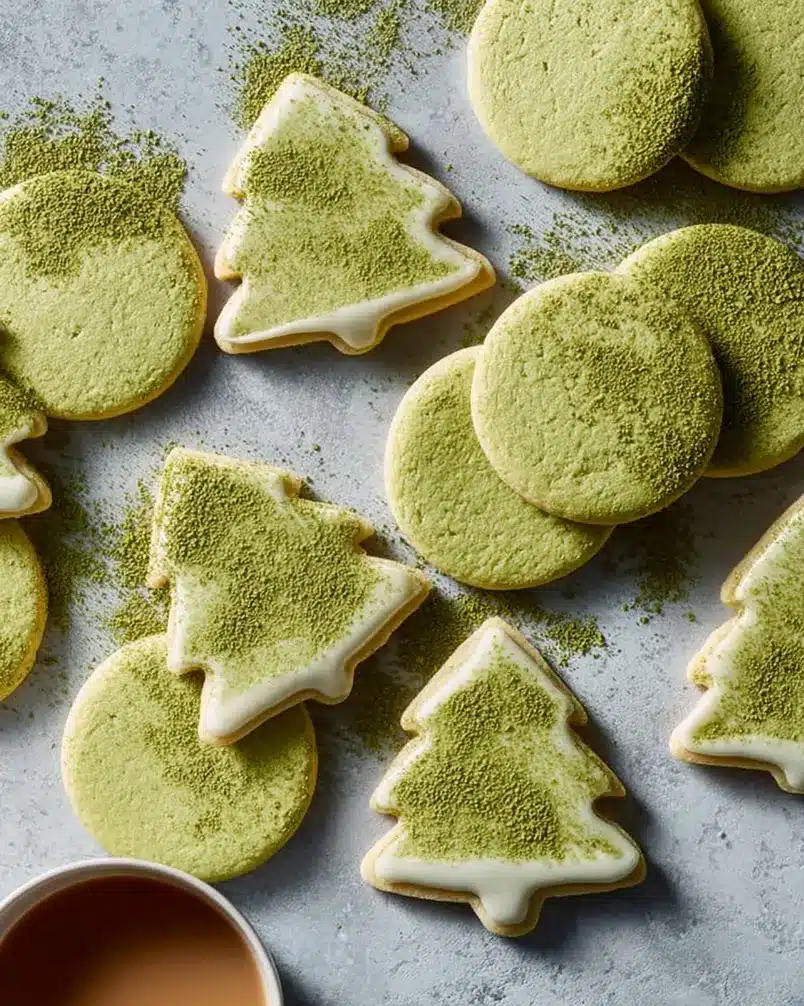
Crafting Your Masterpiece: Step-by-Step Matcha Sugar Cookie Instructions
Get ready to create something truly special! Follow these steps closely to ensure your matcha sugar cookies turn out perfectly every time.
Step 1: The Foundation – Dry Ingredients Unite!
In a medium bowl, whisk together the all-purpose flour, baking powder, and salt. This ensures the leavening agent and salt are evenly distributed, preventing any pockets of bitterness or uneven rise. Think of it as creating a harmonious blend before the wet ingredients join the party. Set this aside for now.
Step 2: Creaming Bliss – Butter and Sugar Dance
In a large bowl, using an electric mixer (or a good old-fashioned whisk and some elbow grease!), cream together the softened unsalted butter and granulated sugar. Beat them until the mixture is light, fluffy, and pale in color. This process, often called creaming, incorporates air, which contributes significantly to the cookie’s tender texture. Aim for about 3-5 minutes of mixing.
Step 3: The Unification – Eggs and Vanilla’s Arrival
Add the two large eggs to the creamed butter and sugar, one at a time, beating well after each addition. This ensures each egg is fully incorporated. Next, stir in the vanilla extract. The aroma at this stage is simply divine!
Step 4: The Matcha Infusion – Hue and Flavor Awaken!
Now for the star ingredient! Add the matcha powder to the wet ingredients. Mix on low speed until the matcha is fully incorporated and you achieve a beautiful, consistent green hue throughout the dough. If you’re a visual baker, watch how the color transforms from pale yellow to vibrant emerald. This is a critical step for evenly flavored matcha sugar cookies.
Step 5: Bringing It All Together – Flour Power
Gradually add the dry ingredients (from Step 1) to the wet ingredients. Mix on low speed, or by hand with a spatula, until just combined. Be careful not to overmix at this stage; overmixing can develop the gluten in the flour too much, resulting in tough cookies. You want a soft, cohesive dough.
Step 6: The Chill Factor – Patience is a Virtue
Gather the dough into a ball, flatten it into a disc, and wrap it tightly in plastic wrap. Refrigerate for at least 30 minutes. This crucial step firm’s up the butter in the dough, making it easier to roll out and preventing your matcha sugar cookies from spreading too much during baking. A chilled dough means beautifully shaped cookies!
Step 7: Rolling Out the Green Carpet – Shaping Your Cookies
Preheat your oven to 375°F (190°C). Line baking sheets with parchment paper. On a lightly floured surface, roll out the chilled dough to about ¼-inch thickness. Use your favorite cookie cutters to create your desired shapes. For a truly festive touch, consider simple circles, elegant stars, or even unique floral designs that echo the matcha theme.
Step 8: The Baking Transformation – Golden Edges, Green Centers
Carefully place the cut-out cookies onto the prepared baking sheets, leaving about 1 inch between them. Bake for 10-12 minutes, or until the edges are lightly golden brown and the centers are set. The exact time will depend on the size and thickness of your cookies. Keep a close eye on them; overbaking can lead to dry matcha sugar cookies.
Step 9: Cooling Down – The Final Touch
Let the cookies cool on the baking sheets for 2-3 minutes before transferring them to a wire rack to cool completely. This allows them to set further before handling, preventing any breakage. As they cool, you’ll notice that vibrant green color deepening slightly.
Nutritional Insights: A Guilt-Free Indulgence?
While matcha sugar cookies are a treat, let’s look at some estimated nutritional information per cookie (assuming 24 cookies from the recipe). Please note these are approximate and can vary based on exact ingredient measurements and brands.
* Calories: Approximately 150-180 kcal
* Protein: 1-2g
* Carbohydrates: 20-25g
* Fat: 7-9g
* Fiber: <1g
* Vitamins & Minerals: Matcha itself contains antioxidants (catechins, particularly EGCG), Vitamin C, and minerals like potassium and iron, offering subtle health benefits even in this sweet form.
Data suggests that incorporating matcha can provide a modest boost in antioxidants compared to a plain sugar cookie. It’s a sweet treat with a whisper of goodness!
Healthier Alternatives: Green Goodness for All
Who says indulgence can’t be mindful? Here are ways to adapt your matcha sugar cookies for a healthier twist:
* Reduced Sugar: Decrease the granulated sugar by ¼ to ½ cup. The natural sweetness of matcha might surprise you, and you can always use a sugar-free glaze or frosting if desired.
* Whole Wheat Flour: Substitute half of the all-purpose flour with whole wheat flour for added fiber and nutrients. You might need an extra tablespoon of liquid if the dough feels too dry.
* Almond Flour Base: For a gluten-free and lower-carb option, replace a portion of the all-purpose flour with almond flour. Note that this will change the texture significantly, making it more crumbly and dense.
* Vegan Butter: As mentioned, use a high-quality vegan butter alternative. Ensure it’s formulated for baking.
* Natural Sweeteners: Explore options like date paste or maple syrup, though these will alter the color and texture of the cookies.
Serving Suggestions: Elevate Your Matcha Moment
These matcha sugar cookies are delightful on their own, but here are some ways to make them even more special:
* Morning Delight: Pair with a warm cup of green tea or a steaming mug of coffee for a sophisticated breakfast or brunch treat.
* Afternoon Tea: Serve alongside a delicate finger sandwich or a bowl of fresh berries for an elegant afternoon tea spread.
* Dessert Presentation: Arrange them on a platter with a drizzle of white chocolate ganache (which beautifully contrasts the green) or a dusting of powdered sugar.
* Decorated Delights: Once cooled, get creative with royal icing in white, pale pink, or even a contrasting black for a dramatic look. Edible glitter or gold leaf can add a touch of luxury.
* Cookie Sandwiches: Sandwich a touch of vanilla buttercream or cream cheese frosting between two matcha sugar cookies for an extra decadent treat.
Common Mistakes to Avoid for Perfect Matcha Sugar Cookies
Let’s learn from the best and avoid some common pitfalls on your matcha sugar cookie journey.
Overmixing the Dough: This is a cardinal sin in sugar cookie baking. Overmixing develops gluten, leading to tough, dense cookies instead of tender ones. Mix dry ingredients into wet ingredients just until combined*.
* Butter Too Melted, Not Softened: For proper creaming, butter needs to be softened but not melted. Melted butter will result in greasy dough and cookies that spread excessively. Aim for the consistency where your finger leaves an indentation but the butter holds its shape.
* Not Chilling the Dough: Skipping the chill time is a recipe for cookie chaos. Chilled dough is easier to handle, cut, and it prevents excessive spreading, ensuring your matcha sugar cookies maintain their shape.
Overbaking: Matcha can make it a bit harder to judge doneness by color alone. Watch for lightly golden edges. Cookies continue to cook on the hot baking sheet after removal, so pull them out when they still look slightly* underdone in the center.
* Using Low-Quality Matcha: The flavor and color of your matcha sugar cookies directly depend on the matcha you use. Opt for ceremonial or high-quality culinary grade matcha for the best experience.
Storing Your Sweet Creations
Proper storage is key to keeping your matcha sugar cookies delicious for days.
* Completely Cooled: Ensure cookies are entirely cool before storing. Warm cookies will release steam, making them soggy.
* Airtight Container: Store cooled cookies in an airtight container at room temperature. They will stay fresh for up to 3-5 days.
* Separation: If you’ve decorated with wet icings or fillings, place parchment paper between layers of cookies to prevent sticking and smudging.
* Freezing Dough: You can freeze the cookie dough discs for up to 3 months. When ready to bake, thaw slightly until rollable, then proceed with the recipe.
* Freezing Baked Cookies: Baked and cooled cookies can also be frozen in an airtight container or freezer bag for up to 3 months. Thaw at room temperature.
The Matcha Moment: Your Invitation to Bake
You’ve journeyed through the delightful world of matcha sugar cookies, from understanding their unique ingredients to mastering the baking process. These cookies are more than just a treat; they’re a beautiful fusion of tradition and contemporary taste, offering a sophisticated and visually appealing delight. Don’t let the vibrant green intimidate you – embrace the subtly sweet, earthy flavor that matcha brings.
Ready to infuse your kitchen with this gorgeous green goodness? Give these matcha sugar cookies a try! We’d love to hear about your baking adventures. Share your creations with us in the comments below, or tag us on social media. If you loved these, be sure to explore our other innovative cookie recipes that are guaranteed to satisfy your sweet cravings!
Frequently Asked Questions About Matcha Sugar Cookies
Q1: What is the best type of matcha to use for baking?
For the best flavor and vibrant color in your matcha sugar cookies, it’s recommended to use high-quality ceremonial or culinary grade matcha powder. Avoid lower-grade matcha, which can be bitter and have a duller hue.
Q2: Why are my matcha sugar cookies spreading too much?
This usually happens if the butter was too soft or melted, or if the dough wasn’t chilled sufficiently. Ensure your butter is softened but not melted, and always chill the dough for at least 30 minutes before rolling and cutting.
Q3: How can I get a more intense matcha flavor?
You can increase the amount of matcha powder by ½ to 1 teaspoon. However, be mindful that too much matcha can make the cookies slightly bitter or dry. Alternatively, ensure you’re using a high-quality matcha powder known for its robust flavor.
Q4: Can I make these matcha sugar cookies vegan?
Yes! You can substitute the unsalted butter with a good quality vegan butter stick designed for baking. Ensure your eggs are replaced with a suitable vegan egg replacer (like flax eggs or commercial egg replacers) if you’re aiming for a fully vegan recipe. The texture might vary slightly.
Q5: Can I use a different flour for these cookies?
You can experiment with alternative flours like almond flour or a gluten-free blend. Almond flour will result in a more tender and crumbly cookie. If using a gluten-free blend, ensure it’s a 1:1 baking substitute. Keep in mind that these substitutions can alter the texture and spread.
Q6: How do I store matcha sugar cookies decorated with icing?
Allow the icing to dry completely before storing. Place parchment paper between layers of cookies in an airtight container to prevent the icing from sticking. They are best enjoyed within 2-3 days when decorated with icing.